 Dylan Auty
 Setup Guide
Prerequisites
- Unity 2022.3+
- Input System Package (
com.unity.inputsystem)
Installation
- Copy
SimpleDriftController/into your project'sAssets/folder - If prompted, let Unity recompile the scripts
- The package should appear in your Project window
Creating a Vehicle
Auto-Configure (Recommended)
- Create an empty GameObject → add
DriftVehiclecomponent - In the inspector, click Auto-Configure
Step 1: Body (Optional)
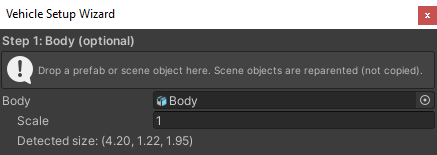
Drop a body mesh (prefab or scene object) into the Body field. Scene objects are reparented; prefabs are instantiated. The body receives a BoxCollider only if no colliders already exist. All body renderers are set to Ignore Raycast layer.
Step 2: Wheel Selection
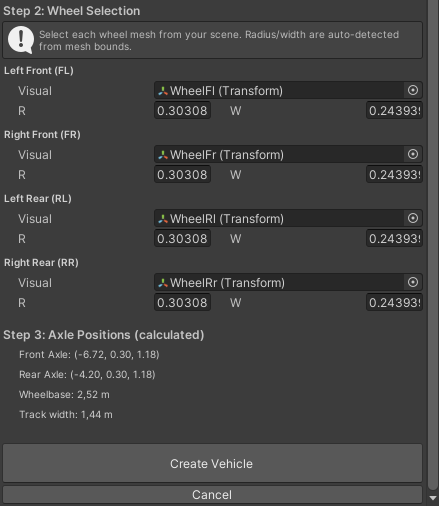
Assign all 4 wheel meshes — Left Front, Right Front, Left Rear, Right Rear. Radius and width are auto-detected from mesh bounds.
Create Vehicle
Click Create Vehicle — the wizard creates:
| Created Item | Details |
|---|---|
| FrontAxle | DriftAxle with left/right wheel children |
| RearAxle | DriftAxle with left/right wheel children |
| DriftWheel (×4) | Per-wheel components with preset radius/width |
| CenterOfMass | Empty transform positioned low |
| Body | Reparented or instantiated with BoxCollider if needed |
Manual Setup
- Create an empty GameObject → add
DriftVehicle+Rigidbody - Create axle GameObjects as children → add
DriftAxle - Create wheel GameObjects as children of axles → add
DriftWheel - Set
leftWheel/rightWheelreferences on each axle - Set
axlesarray on the vehicle - Create a CenterOfMass child and set the reference
Configure Axles
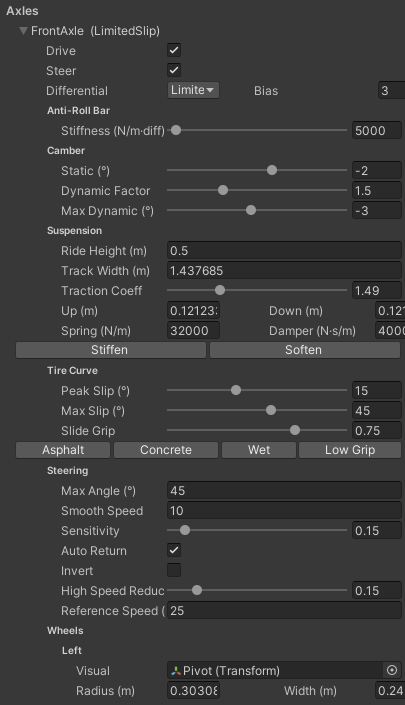
Each DriftAxle has per-axle settings for suspension, camber, tire curve, steering, differential, and anti-roll bar.
Vehicle Presets
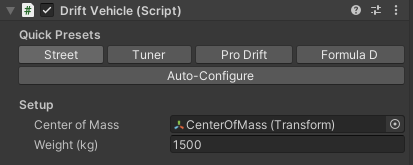
One-click buttons that set weight, engine, transmission, suspension, differential, and traction control for common drift builds.
Engine Presets
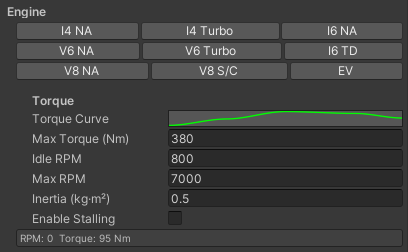
| Preset | Max Torque | Max RPM | Character |
|---|---|---|---|
| I4 NA | 250 Nm | 7,500 | High-revving, peaky |
| I4 Turbo | 380 Nm | 7,000 | Broad torque, responsive |
| I6 NA | 400 Nm | 7,000 | Smooth, linear |
| V6 NA | 500 Nm | 6,500 | Torquey mid-range |
| V6 Turbo | 600 Nm | 6,500 | Big torque |
| I6 TD | 550 Nm | 5,500 | Diesel, low-end grunt |
| V8 NA | 650 Nm | 6,000 | Classic muscle |
| V8 S/C | 750 Nm | 6,500 | Supercharged |
Transmission Presets
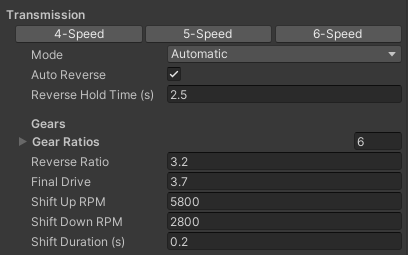
| Preset | Ratios | Final Drive |
|---|---|---|
| 4-Speed | 4.0 / 2.5 / 1.7 / 1.0 | 4.1 |
| 5-Speed | 4.0 / 2.5 / 1.7 / 1.2 / 0.9 | 3.9 |
| 6-Speed | 4.0 / 2.5 / 1.7 / 1.3 / 1.0 / 0.8 | 3.9 |
Input Setup
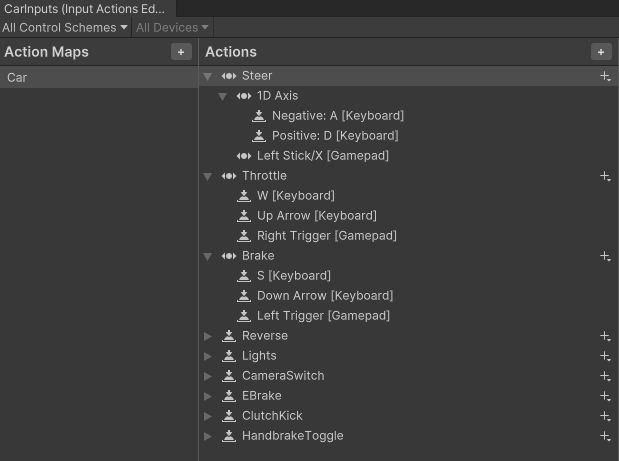
- Add
PlayerInputcomponent to the vehicle - Set Actions to
SimpleDriftController/Input/CarInputs.inputactions - Set Default Map to "Car"
- The
DriftInputSystemscript will auto-detect the PlayerInput
Camera Setup
- Create a Camera GameObject
- Add
DriftCameraControllercomponent - Drag the vehicle into the
vehicleslot - Tune for your scene:
- Swing-Out:
swingOutDistance(default 2.5) controls lateral offset during drifts - Velocity Look:
velocityLookBlend(0–1) blends camera look between car forward and velocity direction - Spin Threshold: lower
spinYawThresholdto make the camera focus on the car sooner during spins
- Swing-Out:
For multiple cameras, add DriftCameraManager to the vehicle and assign cameras to the list.
Audio Setup
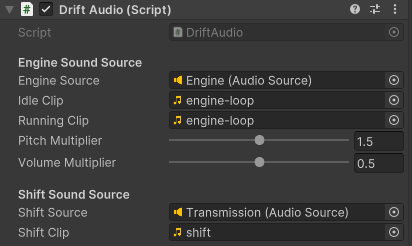
- Add
DriftAudioto the vehicle - An
AudioSourceis auto-created if none exists — no manual AudioSource setup needed - Assign
runningClip(engine loop while driving) and optionallyidleClip(idle rumble) - The running clip always has a minimum volume floor at idle, so you'll always hear the engine
Default values: pitchMultiplier = 1.0, volumeMultiplier = 1.0
Effects Setup (Skid Marks & Smoke)
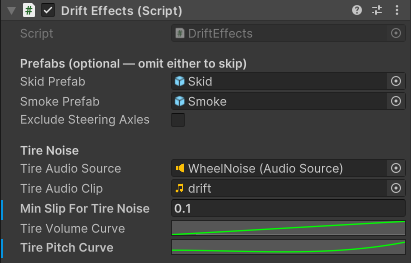
DriftEffects spawns prefabs per wheel and drives them by slip. You can provide one, both, or neither.
Creating a Skid Mark Prefab
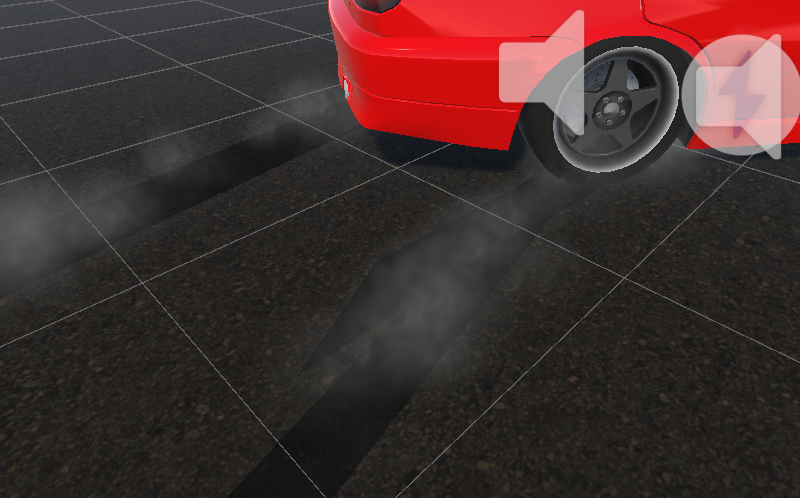
- Create an empty GameObject
- Add a
TrailRenderercomponent - Configure the trail:
- Set a dark/black material
Time: ~2–4s (how long marks persist)Start Width: ~0.05,End Width: ~0.01Min Vertex Distance: ~0.1Autodestruct: off
- Save as a prefab (drag to Project window)
- Assign to
skidPrefabonDriftEffects
Creating a Smoke Prefab
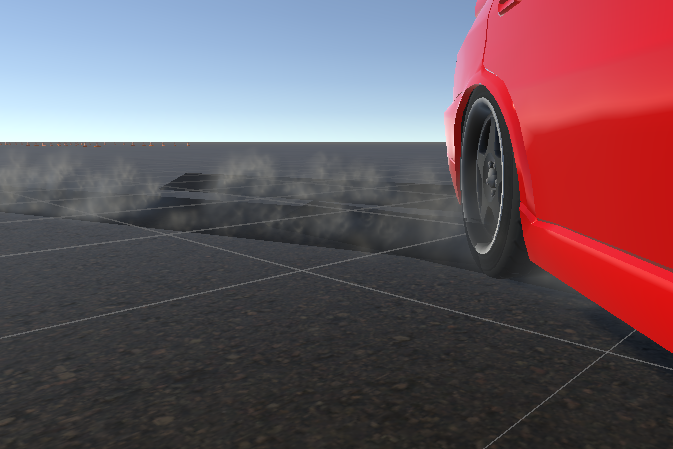
- Create an empty GameObject
- Add a
ParticleSystemcomponent - Configure the particles:
- Set a smoke/cloud material
Duration: 1,Looping: onStart Lifetime: 0.5–1.5sStart Speed: 0.5–2Start Size: 0.2–0.8Start Color: white/grey with low opacityShape: Box or Cone (small)Renderer: use a smoke material
- Save as a prefab
- Assign to
smokePrefabonDriftEffects
The DriftWheelEffects component is auto-added if missing — it finds TrailRenderer and ParticleSystem on the prefab root and toggles emission on/off based on slip thresholds. Width and rate are whatever you configure on the prefab — the code doesn't override them.
Exclude steering axles: Check excludeSteeringAxles on DriftEffects to prevent skid marks and smoke on front wheels — for an arcade feel where only the rears lay down effects.
Tire Noise
Assign an AudioSource and clip on the tireAudioSource/tireAudioClip fields. Optional — if null, no tire noise plays.
Drift State (Scoring)
- Add
DriftStateto the vehicle - Configure detection thresholds (
minDriftAngle,minDriftSpeed) - Access
IsDrifting,DriftScore,DriftCount,MaxDriftAngleat runtime - Call
ResetScore()to zero everything
Lights (Optional)
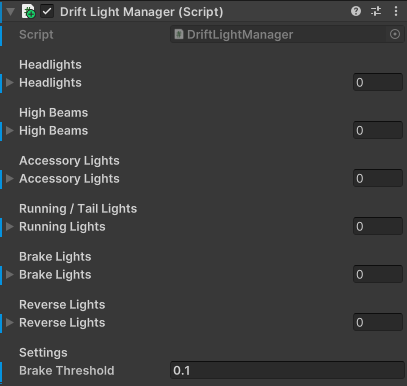
Add DriftLightManager to the root. Create child GameObjects with Light components and assign them to the headlight, brake, and reverse light lists. Brake lights auto-illuminate when braking; reverse lights auto-illuminate in reverse.
Telemetry Display
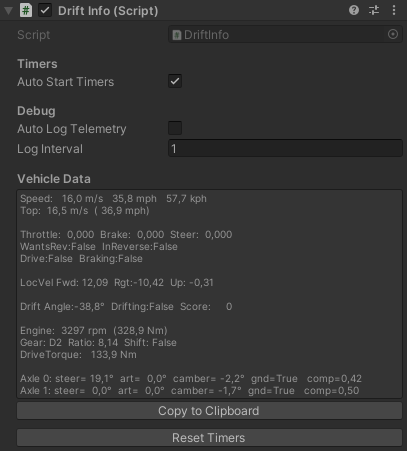
- Add
DriftInfoto the vehicle - In Play Mode, the
DriftInfoEditorshows live data in the inspector:- Speed, throttle, steering
- Engine RPM, gear, drive torque
- Per-axle articulation, compression, steer angle, camber
- Drift angle, drifting status, score
- 0–60 / 0–100 timers
- Press F12 to log telemetry to the console
- Click Copy to Clipboard to export the current data
Final Checks
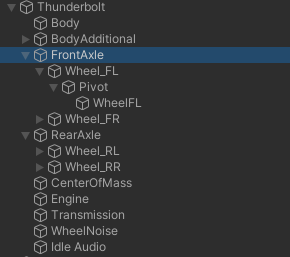
- Verify the Center of Mass position in the Scene view
- Check suspension visualization: ride height rings, travel lines, steer cone
- Test drive!
Camber Tuning Tips
- Street / Beginner:
-1.5°front and rear — mild turn-in improvement - Tuner / Aggressive:
-3°front,-1.5°rear — sharper turn-in, stable exit - Pro Drift:
-4°to-6°front,-2°to-3°rear — max angle entry, strong rear grip - Formula D / Competition:
-6°to-10°front — extreme angle kit - Dynamic Camber Factor: 1–2× for mild body-roll response, 3–5× for aggressive
- Static Camber: negative values tilt wheel tops inward (both sides), positive tilts outward
Banked Slopes (Static Friction Hold)
The Static Friction Hold section on each DriftAxle keeps the vehicle planted on banked surfaces while stationary:
- Coefficient (default 1.8): static grip vs the slope. Holds banks up to roughly
atan(coefficient)— at 1.8 that's ~61°. - Max Slope (default 60°): explicit cap; beyond it the vehicle slides realistically.
- Speed Threshold (default 0.5 m/s): only active when nearly stationary, so drift behavior is unaffected.
If a vehicle slides sideways while parked on a bank, raise Coefficient or lower Max Slope until it holds — no other grip settings need touching.
Standstill Jitter (Stationary Stabilizer)
The Stationary Stabilizer on DriftVehicle eliminates jitter at 0 speed (gravity compensation + residual velocity damping + a lateral-force deadband on each axle):
- Speed Threshold (0.2 m/s) and Angular Threshold (0.3 rad/s) define the "at rest" envelope
- Grace Time (0.2 s) is the hysteresis — it must be below the thresholds for this long before engaging, so slow drifts never trigger it
- Blend Speed (6) controls how smoothly it engages/releases — no catch, no pop
- Any input (throttle, brake, e-brake, steer) instantly releases it
If you still see micro-sway at rest, raise the Deadband (°) setting under each axle's Tire Curve section.
Tips
- Drift Angle Kit: Increase
maxSteerAngleon steerable axles (45°–70°) for wider drift angles - Camber: Start with -1.5° to -3° static camber on front for turn-in, less on rear for stability
- Clutch Kick: Bind to a convenient button for initiating drifts — spikes torque briefly to break traction
- Traction Control: Set to 0 for full control, 0.5+ for more forgiving handling
- Suspension: Stiffer rear springs promote oversteer, stiffer front promotes understeer
- Anti-Roll Bar: Higher values reduce body roll but can cause inside wheel lift — 5000–15000 is typical for drift