 Dylan Auty
 Setup Guide
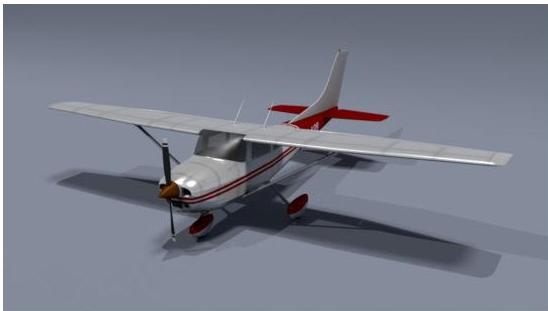
Note: This document, the setup guide was converted from the original PDF shipped with the asset. I've moved to MD files to allow cloud hosting moving forward
Thank you for purchasing the Simple Airplane Physics controller, I really appreciate your support! I am confident this physics system will help you achieve your goals with airplane controls and physics.
Please remember, if you have any questions about the system you can get in touch with me at the email address below:
- degwanta@gmail.com
I always do my best to provide world-class support to all users who purchase my assets, and would love to hear your thoughts and opinions on how I can improve the system moving forward!
Getting Started
Airplane physics can be quite intricate to get a grasp on and as such, I highly recommend using the pre-bundled prefab before building your own planes from scratch.
With that said, the system does fully support building your own airplanes! More specifically, the system allows you to add as many, wheels, engines, fuel tanks, and control surfaces (ailerons, rudders, flaps, and elevators) as you would like!
Let's start by opening the ExampleScene found within the SimpleAirplaneController folder:
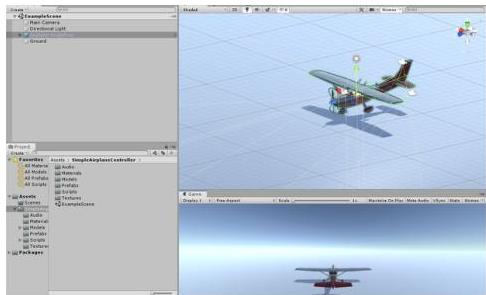
Within this scene, you should see a prefab named Airplane-SingleProp click on it now and we will go through the overall setup of the plane, as well as each script.
Taking a look at the structure of the plane object you should see the following:
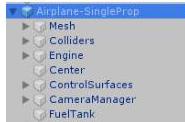
The parent game object holds the primary scripts which control the plane physics system, as well as a rigidbody. There is no need to adjust the rigidbody as this added and managed by the AirplaneController script, however, we will look at this in more detail later.
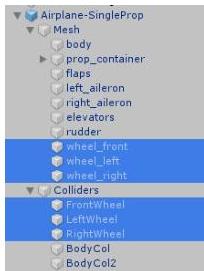
The Mesh object holds all the graphical mesh objects. For example, you will see the plane body, ailerons, flaps, rudder, elevator, and wheels are all contained within this object.
Colliders hold the box colliders used for collisions, this is setup as a group of colliders to allow you to mimic the overall shape of the plane quite accurately. You can add/remove as needed for your own plane designs. As a side note, you can also make use of a mesh collider instead if preferred. I found the box colliders are a bit easier to manage and manipulate though.
Next, the Engine object is an empty game object which is positioned where the graphical engine is located. It has the AirplaneEngine script attached which allows you to tweak this single engines properties. Once again, we will look into this in more detail later in the Scripts Overview segment.
Center is responsible for overriding the planes Center of Gravity. This can be removed, to allow Unity to generate its own center of gravity. However, you will get much better results by creating your own as planes are generally heavier towards the engine than the rest. Although this may not be true for a plane carrying cargo. As such this control is great for changing the overall behavior of your code.
Control Surfaces holds various empty game objects using the AirplaneControlSurface script. This script handles animation of graphical items within the Mesh object such as elevator and rudder as an example. The position of these empty objects do not matter as they simply act as controllers
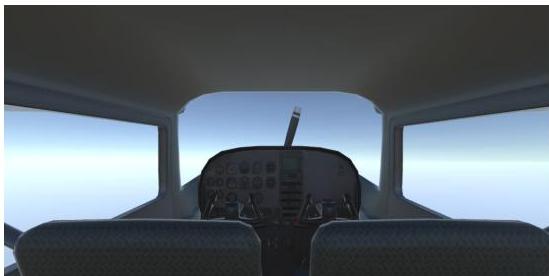
Our Camera Manager object holds a script responsible for allowing users to switch cameras while in game. This key can be mapped to your preference, which we will look at later. The rigged model includes various cameras by default. These cameras are nested within this manager as it will stick to the plane. However, our main camera is located outside of the plane prefab as it uses a follow script to 'chase' the plane as it moves.
The Fuel Tank is an empty game object, with an AirplaneFuelTank script attached. This is entirely optional, and can be removed from your own planes to disable the need for fuel. The position/location does not matter as it does not currently add weight to the plane. We may add that later though!
That concludes the overview of the structure of the plane. Use this structure and prefab as a blueprint to create your own planes if you would like!
Script Overview
Now that we have a good understanding of the plane prefab and its structure, let's take a look at each script on the plane and how it affects the overall behaviour of our airplane!
Primary Game Object:
Start by clicking on the primary game object and viewing its properties on the right hand side (default location) within Unity. Follow along below to learn more about each component on this game object.
Airplane Information:
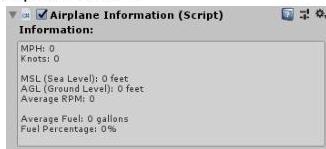
This component will give you realtime information about the airplane. Things like speed, altitude and fuel remaining can all be found here.
This component does not have any settings and acts purely as an accessor for airplane information. For example, you could use this component to build your own graphic dials or user interface showing readouts of the planes information.
We will take a look at this later in the Extending the code segment of this document.
Airplane Aerodynamics:
| Airplane Aerodynamics (Script) | |
|---|---|
| Lift Settings: | |
| Max MPH | 120 |
| Max Lift Power | 5000 |
| Lerp Speed Multiplier | 0.03 |
| Lift Curve | |
| Flap Lift Power | 100 |
| Drag Settings: | |
| Drag Factor | 0.01 |
| Flap Drag Factor | 0.007 |
| Control Settings: | |
| Pitch Speed | 3500 |
| Roll Speed | 3000 |
| Yaw Speed | 3000 |
| Control Surface Effic | |
| Ground Effect Settings: | |
| Enabled | ☑ |
| Distance (Wing Length) | 3 |
| Lift Force | 100 |
| Max Speed | 15 |
This script allows you to adjust the aerodynamic properties of your plane. You can setup things like the maximum MPH the plane can achieve, lift power, drag factors, ground effect, roll speed and more.
If you are unsure about these, adjust them one at a time, give the plane a fly around the scene and see what results you get out of the changes. Each property is self explanatory, but some experimentation is suggested to get a good understanding of what each property effects within your plane!
Airplane Controller:
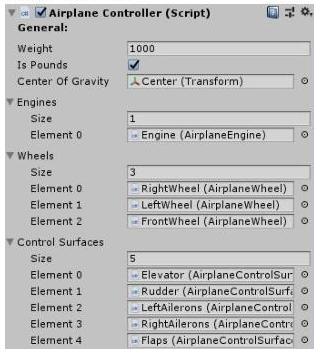
The main controller handles everything and should be seen as the “glue” of the plane script. It allows you to setup the weight of the plane, the center of gravity object, and dynamic items such as engines, wheels and control surfaces!
This script will also automatically add the following components as it requires them:
- Rigidbody
- Airplane Aerodynamics
- Airplane Input
As such, there is no need to add these, however, you will need to add the engines, wheels, and control surfaces to your preference.
You may also want to adjust the starting drag forces on the Rigidbody, however, this is not required. The aerodynamic script will adjust these dynamically as you interact with your airplane.
Some notes to remember:
- Center of Gravity should be an empty transform that is assigned to this script. Once assigned, you can move the center of gravity to your preference in the scene view.
- You can tell the script whether your weight is in pounds, or kilograms using the checkbox provided
- Engines must have the Airplane Engine script attached to them or they will not bind
- Wheels must have the Airplane Wheel script attached to them or they will not bind
- Control Surfaces must have the Airplane Control Surface script attached to them or they will not bind
Airplane Input:
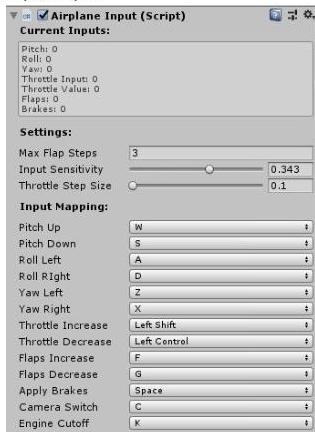
The input script is used to map all keys to your preferred inputs. This script is also responsible for setting the max flaps steps, which is directly used in animations and physics calculation.
For convenience, I have also added an input sensitivity and throttle step value to help you achieve the exact results you are hoping to achieve.
Some inputs will have a positive and negative key, for example Pitch Up and Pitch Down, while other inputs will have a singular input such as the Camera Switch.
Above the input controller you will see a realtime readout of input values. These values will vary from between -1 and 1 and act as Unity Axises.
Note: You can override/extend the class responsible for this if you are relatively experienced in C#
Engine Game Object:
Let's take a look at our engine game object.
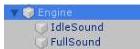
This is an empty game object, which has the Engine Script attached to it. In addition it holds two nested (empty) game objects which hold out sounds for the engine.
These components each have an Audio Source attached to them, which is later assigned to the Engine Script for management.
It should be noted, that it does matter where the Engine game object is place within your plane. You will notice below, it is positioned roughly where the visual engine would be.
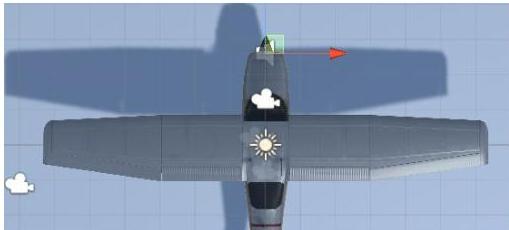
This is because the physics force is added from this location.
Now we will continue to look at the Engine Script in more detail, along with it's attached components.
Airplane Engine:
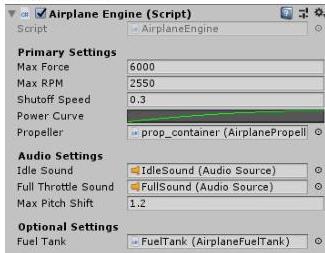
The engine script is responsible for adding Thrust to your plane. You can add multiple engines to a single plane and add them all to your primary container to have them work together.
This script also allows you to adjust the max RPM and force. You can also adjust the engines power curve to simulate your engine design as closely to reality as possible.
Here you will also see a reference to the Propeller for the engine. This is the “Visual” propeller in your mesh, which we will cover next.
One final note here is that you can also bind two audio sources to the engine. One for the idle sound, and another for the full throttle sound. This is optional and can be left out to disable the audio.
Lastly, we can also add a fuel tank (to be discussed later) which will cutoff the engine once fuel is depleted.
Propeller Game Object:
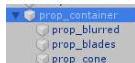
As seen above, the visual propeller contains a few items within it. Although none of these are required, we do recommend adding the primary propeller blades, and a secondary blurred quad plane for high speed animations.
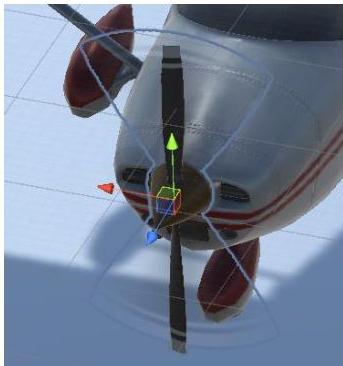
The propeller script, which is attached to the container, will then switch between the 3D propeller at low speeds and will switch to the blurred quad at higher speeds.
Propeller Script:
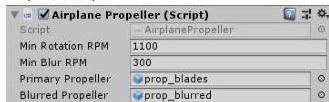
The propeller script is purely responsible for animating the propeller, based on the engine speed. This allows it to switch between the primary and blurred propeller accordingly.
Airplane Wheel:
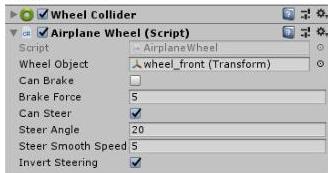
The wheel script is responsible for managing the wheels on the plane. You can add as many wheels as you like under the Airplane Controller Script.
Here you can attach the visual wheel mesh, for animations, and also adjust the brake force, steering angle, and the animation smoothing speeds.
You can also let the Airplane controller know whether or not a wheel can steer or brake.
Note: This script relies on a Unity Wheel Collider to do friction calculations, apply brakes and steer.
It is also important to note that all of our wheel colliders are held within the collider parent object. Respectively, the graphic meshes for each wheel are held within the mesh parent object. This is the recommended setup.
Control Surface Parent Object:
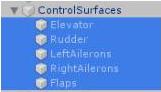
You will notice the Control Surfaces game object contains a group of empty control surface objects. Each one of these objects has a Control Surface Script attached to it. These are responsible for animating things like the ailerons, elevator and flaps.
Control Surface Script:
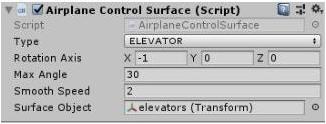
The control surface script is responsible for taking inputs from the Airplane Input script, binding these to graphical meshes, and animating them on your desired axises.
The Type you select will be bound to the inputs setup in the Airplane Input Script.
You can then adjust the axis around which to rotate the control surface. Additionally, the angle, speed, and graphical mesh can be setup here accordingly.
Fuel Tank (Optional)
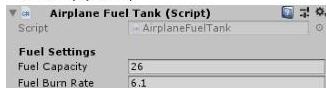
Fuel tanks can be used to add realism to your airplane. When connected to an engine, the fuel tank will slowly decrease in capacity while the engine is being used.
Once the fuel capacity is depleted, the engine it is connected to will begin to power down and the plane will lose altitude due to a loss of power.
This is not required, and does not alter the physics in any way.
Primary Camera:
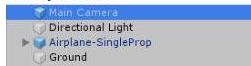
You will notice we have various cameras in our example scene, however, one of these camera is not nested within the plane prefab. This is because it is has a follow script attached to it which means it chases the airplane as it flies. This creates a much smoother flying experience as the camera is not snapped to the plane rotation/location.
Follow Camera Script:
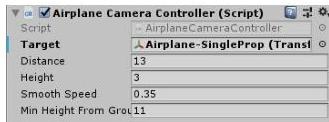
The script for the follow camera is quite simple, and could be used in other projects as well!
It allows you to set a target to follow, follow distance, height and the smoothing speed. We also allow the camera to elevate itself when the plane is close to the ground.
As I am sure you can see, this is quite a useful script in general, and adds a lot of additional visual fidelity to the plane controller.
Additional Cameras:
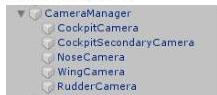
All additional cameras do not make use of any follow scripts as they are placed inside of the plane parent controller. This means they have fixed locations within the plane.
On our Camera Manager object, you will find a manager which allows the user to switch between cameras.
Camera Manager Script:
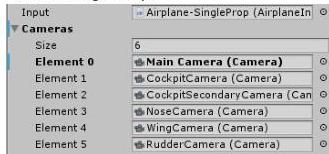
The Camera manager script require you to bind the airplane input object to it. This allows it to check when the user pressed the Camera Switch Key and change between cameras.
You can add as many cameras as you would like to the Cameras list. Fantastic for additional plane perspectives!
Development Overview:
Although all scripts are designed to extend easily, and change if needed, I thought it may be useful to touch on some of the ways to get information from some of the scripts.
We will cover two examples, the first being the Airplane Information script and the second being the Fuel Tank script.
Airplane Information:
I thought it may be useful for you to be able to obtain the airplane speed from the Airplane information script.
As such, I have added some publicly accessible Properties:
/ Properties / public float MSL{ get { return meanSeaLevel; } }
public float AGL{ get { return aboveGroundLevel; } }
public float RPM{ get { return averageRMP; } }
public float Fuel{ get { return averageFuel; } }
public float FuelNormalized{ get { return averageFuelNormalized; } }
public float MPH{ get { return milesPerHour; } }
public float Knots{ get { return knotsPerHour; } }
This allows you to obtain information about the plane for creating things like visual interfaces for your users!
Fuel Tanks:
As fuel tanks are depleted based on the engines bound to them a public method was added to allow you to refuel the plane.
public void AddFuel(float fuelAmount){ currentFuel += fuelAmount; currentFuel = MathF.Clamp(currentFuel, 0f, fuelCapacity); }
You can call this method, with a float value as an argument, to refuel the plane. As an example, you could trigger this method to fire when the plane enters a collider. If you need help setting something like this up, let me know and I will be sure to assist!
Similarly, you may want to reset the fuel tank to its original capacity (full tank), which can be achieved with the following method:
public void InitFuel(){ currentFuel = fuelCapacity; }
Mesh Provided:
The plane provided with this project was not designed by me personally, but was bought for commercial use and the author has given me permission to bundle this with my project to all of my clients. As such you all have permission to use this plane in your games as well!
If you want to support the artist responsible for this brilliantly put together plane, please check out his assets here: https://www.cgtrader.com/3d-models/aircraft/private/zessta-281